• About

My Enchanting Whims

~ Enchanting

My Enchanting Whims

Tag Archives: enchanted trees

Enchanted Tree Tutorial

23 Saturday Jul 2016

Posted by stephiep1016 in Fairy Gardening

≈ 2 Comments

Tags

enchanted trees, fairy gardens, personality, polymer clay, sculpting, whimsical

<i

A Swinging Tree

A Swinging Tree

20150825_110402-1

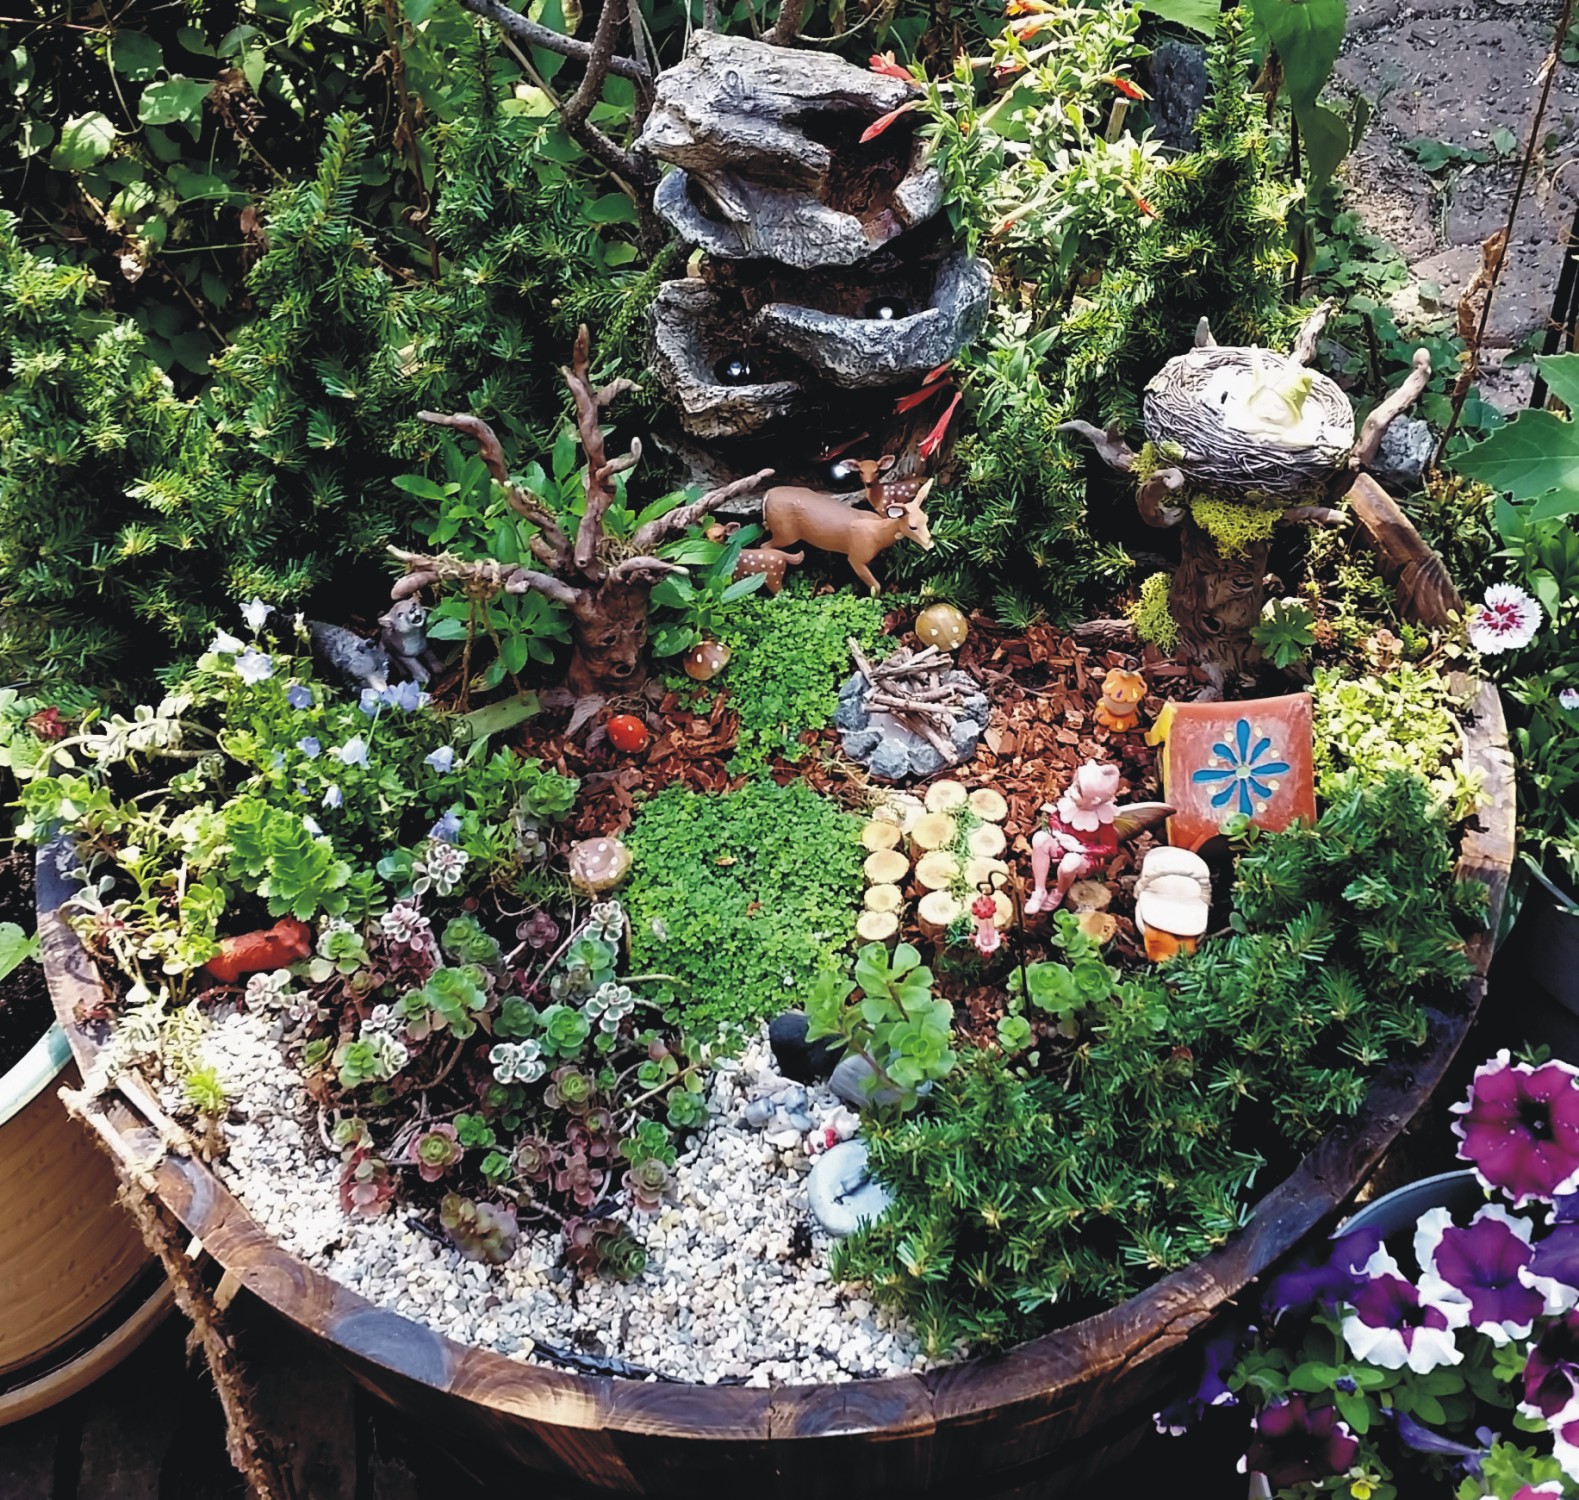
Okay…I know some of you have been waiting for a tutorial on how to make the enchanted trees for the fairy gardens.  I apologize that it has taken so long, but have been out of commission for about six months, nursing two sprained feet and ankles back to health…ouch! Don’t ever sprain your feet and ankles…you can’t do anything!!!! Here it is the middle of July and I don’t even have all of my fairy gardens out.  Guess it will have to wait until next Spring.  That is something to look forward to.  In the mean time I will work on items for the fairy gardens.

I am kind of new to this tutorial writing, so please ask questions if you have them. These trees are quite easy to make.  The main thing is to not try to make it too perfect. There is no such thing as a perfect tree…especially enchanted ones.  So give the tree a personality all of its own.

Supplies Needed:

16 gauge wire ( I used copper)

wire cutters

pliers for bending wires

various tools for shaping and making lines (toothpicks work well)

polymer clay in a variety of colors (I use mostly sculpey clay, but also have a tub of scraps from previous projects, so I use it all, as long as it is clay that needs baking at about the same temperature for about the same time)

glass bird eyes (optional…I order them from a wood carving company called Chipping Away.  I get the glass, dark brown, flat back, 4mm eyes, but you can also just engrave the eyes onto the tree or paint them.  My sleeping tree has his eyes closed.  Anything is doable.)

glass eye

aluminum foil

toaster oven or standard oven for baking


Cut 8-12 lengths of copper wire.  Allow enough length for roots, trunk, and branches in each cut.  The two trees in this fairy garden have trunks about 4-5″, but allow a tiny bit more because you will twist the wires together and that will shorten the length.  I buy copper wire by the spool because I also make jewelry.  I get it at The Naja, my jewelry making supply store.  I am sure there are many other places that carry it by the spool too. If you are only going to make one or two trees you might not want to go that way.  You can also buy it in smaller quantities.

ATT00045           wire division


Twist all of the wires together in the middle to form a trunk.  Bend the roots out and the branches.  I sometimes loop the ends of the wires to prevent getting scratched while working on the tree.

twisted wires

Take aluminum foil and wrap around the wire trunk.  You really don’t need to wrap foil around the branches or roots…just the trunk.  Keep wrapping until it is as thick as you want it…remember that the clay will also add some width to the trunk.  Scrunch it together.  Don’t worry about making it smooth or even…tree trunks are usually bumpy and lumpy.

foil trunk

Now take the branches and fan them out and do the same with the roots.  You don’t have to have them perfect.  You can move them around a bit later.  I like to fan out the roots and see how it sits on a table.  If the branches or roots seem too long, you can trim them now.  Make the branches and roots all wavy and irregular.  Tree branches and roots are not all the same length or width.  We will add smaller branches using the clay, so these are just the main branches.  The roots just need to be long enough to keep the tree from falling over.  They can be off the ground in spots too.

Take your clay and after working it in your hands to soften, start spreading it all over the foil, covering it at least 1/8 to 1/4 inch thick.  Cover the trunk and then start adding clay to the wire roots and branches.  Remember that both are thicker by the trunk and then get thinner.  You can make lumps and bumps on the branches and roots. You can also add some tiny side branches off of the wired branches by just using some clay. Sometimes I put small holes in the lumps to look like knots in the trees.  You can also make hollowed out looking broken branches by adding clay in between branches not using wires.

20160723_110024

After you get all of the branches, roots, and trunk covered, check for spots that didn’t get covered.  Also make sure the tree stands properly without falling over.  Now take your toothpick or sculpting tools and start etching lines in the clay.  Make some swirly and irregular.  Make sure to engrave lines on the branches and roots too.

20160723_111814

20160723_114120

If you are adding glass eyes, now is the time to add them.  I usually etch into the clay where I want them.  I then gently press the eyes into the clay.  Keep working with them until they look the way you want them to.  The clay won’t harden if you keep working on it.  If you make a mistake you can pull the clay off and fix it.  Give the tree some personality.  You can add a nose and mouth too.  There is no wrong way of doing these trees.

When you are completely happy with the tree, it is time to bake it.  If using a toaster oven, I cover the tray with foil and then lay the tree down so that it will fit.  Please be sure to open doors and windows.  The clay gives off fumes when baking.  Bake according to the clay package instructions.  Let the tree cool completely after baking.

If you want to accent the lines in the bark of the tree after baking and cooling, you can use some dark brown acrylic paint.  Paint it all over the tree and then gently wipe off the surface, leaving the lines dark.

I like to glue some dry moss here and there onto the branches and roots.  I use Gorilla Glue for Wood because it holds up outdoors and it seems to work fine with polymer clay.


Advertisement

Share this:

  • Pinterest
  • LinkedIn
  • Facebook
  • Twitter

Like this:

Like Loading...

Hi Ho, Hi Ho, a Camping We Will Go!

25 Tuesday Aug 2015

Posted by stephiep1016 in Fairy Gardening, Gardening

≈ 4 Comments

Tags

bear cub, camp ground, deer, enchanted trees, fairy baby, flower fairy, flowers, fox, mushrooms, nature, owl baby, owl nest, picnic bench and table, swing, tent, waterfall, wildlife, wolf

The fairies have enjoyed the lake, but are now ready to really get away and enjoy nature in a secluded setting.  They have decided to fly there to save time.  If you have your fairy dust, sprinkle away, and let’s go!

We are going to land on the east edge of the garden.  Remember that you can click on the images to enlarge them for better viewing.

Happy Camper Aerial

It is a very brief walk to the campsite.  Just follow the gravel road.  Be sure to watch out for wildlife.  On the left you can see a red fox hiding in the plants.

foxy

Now be careful!  I hear a bear.  Sometimes the black bear cubs get into the trash by the camp ground.  We can sneak by him if he is busy digging in the trash can.  There he is….sneak by quietly.  I made the bear, the trash can and the garbage out of polymer clay.  I love that polymer clay!  You can make almost anything out of it.  Go to your right when you get past him.

bear in trash can

Picinic Happy Camper Aerial

One of our fairy friends, the Red Campion Flower Fairy, is already here waiting for us.  She brought a big picnic basket full of food.  The tent is up and there is a nice picnic bench and table there.  The table and benches are made out of little discs of juniper branches that my husband had cut for me.  Just glue several discs together with a hot glue gun and add some moss here and there.  I made the picnic basket, the lantern and the camp fire pit out of polymer clay and stones.  The camp fire pit is full of wood and ready to light.  A hummingbird feeder is there and there is a hummingbird enjoying some juice.  After we have something to eat, we will go exploring.  Try not to make too much noise.  Next to the tent is a sleeping enchanted tree with a big owl nest in its branches.  I made the tree using polymer clay and a big dose of imagination.  I would be happy to post instructions for the trees in a later post.  There is an owl baby and a fairy baby taking a peaceful nap.  How cute is that!!!!

Elf Baby and Owl in Sleeping Enchanted Tree

Lets go exploring.  There is a waterfall near by.  I see a doe and her fawns by the waterfall.  There are all kinds of flowers and plants to look at.  Some of the plants have already bloomed and others are getting ready to.  I really like the blue bell flowers and I love the miniature trumpet vine next to the waterfall.  The flowering plants all came from the local nursery.  They had a big sale one day and I went crazy.  The ground cover is from the lumber yard garden center.

Mountain Fountain 2

Now if we go to the left, you will find another enchanted tree.  This tree has a swing to have  fun on.  The tree is friendly but is quite old, so be gentle with him.   Don’t eat the mushrooms that you see around the campgrounds.  They might be poisonous.  They are pretty to look at though.

Enchanted tree with swing closeup

I hear some rustling in the woods.  It appears there is a momma wolf and her cub watching us play.  Just let her be and please don’t give the or any of the wildlife any food.  The wolf and her baby, as well as the doe, the fawns, and the fox all came from Hobby Lobby in the department for model railroad scenery.

Momma Wolfe and Cub

Soon we can return to the camp site and have some dinner by the campfire and some restful sleep in the tent.  The moonlight will make the waterfall appear to be lighted.  It is well worth seeing.  I will post a photo of the waterfall at night if I can get a good one.  I will post it in another post update.

There you have it!  I have shown you all four of my miniature fairy gardens.  I hope you enjoyed the journey.  I get so much enjoyment sitting on the deck looking at the fairy gardens.  I enjoy gardening in them too.  They need to have maintenance done daily. It’s light gardening and very enjoyable.  Fairy gardening is very relaxing, eases stress and anxiety, boosts the imagination, and is a great way to sink yourself into another world for a quick get away.  I highly recommend it for everyone.

I don’t know if any more will develop, but I will keep you posted.  I have some whimsical ideas floating around in my head.  There is only about a month left, if that, of gardening weather here.  I will have to take all of the gardens apart and everything but the plants inside for the winter.  I am hoping the plants make it through the winter weather.  Maybe I should work on indoor fairy gardens for the winter months.  Let me know if you have any questions.

Share this:

  • Pinterest
  • LinkedIn
  • Facebook
  • Twitter

Like this:

Like Loading...

Valuable Web Sites

  • Beneath The Ferns Fairy Houses, Fairy Gardens, Miniatures, Tutorials
  • Miniature-Gardening Fabulous online retailer from Wisconsin who has miniature-gardening supplies, videos, how-tos
  • My Fairy Gardens Animals, Fairies, Fairy Doors, Furniture, Houses, Landscaping, Accessories, Seasonal,Large Garden Fairy Stones Mini Garden Themes
  • National Wildlife Federation Create your own certified wildlife habitat
  • Paulino Gardens Garden supplies, flowers, ground covers, trees, shrubs, containers, everything you need for gardening of all kinds
  • The Naja Tool and Supply This is a fabulous store. They carry almost anything you can think of needing for making jewelry. I have never met friendlier people. There is a jewelry making school next door that teaches everything you would ever want to learn about jewelry.

Archives

Categories

  • Essential Oils
  • Gardening
    • Fairy Gardening
    • Wildlife Habitat

Enchanting Whims

Enchanting Whims

Create a free website or blog at WordPress.com.

Privacy & Cookies: This site uses cookies. By continuing to use this website, you agree to their use.
To find out more, including how to control cookies, see here: Cookie Policy
  • Follow Following
    • My Enchanting Whims
    • Already have a WordPress.com account? Log in now.
    • My Enchanting Whims
    • Customize
    • Follow Following
    • Sign up
    • Log in
    • Report this content
    • View site in Reader
    • Manage subscriptions
    • Collapse this bar
%d bloggers like this: